A Virtual Machine for All My Website Needs
As the astute reader will notice I have not been adding any content to this website in quite a while. Nothing I was experimenting with seemed interesting enough to turn it into a blog post that would fit this site. Until Elon Musk took over Twitter. Let me explain.
Have you ever had a seemingly small task snowball into a larger undertaking? That happened to me when Elon Musk’s antics drove people, including me to check out Twitter alternatives. Mastodon was one of the bigger beneficiaries of that trend, widely reported in the news: Twitter owner Elon Musk is driving user growth at Mastodon.
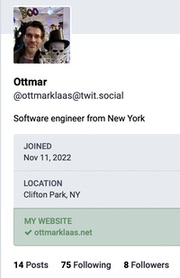
Signing up and filling out my profile was quickly done. And like Twitter, Mastodon allows someone to link from their profile to their website. It will try to verify the link by scanning the website for a link back to the profile. If such a link is found, it can be assured that the Mastodon account owner controls that website. Mastodon rewards the successful verification by highlighting the link in green. That’s $11 bucks savings every month compared to Twitter’s blue checkmark pricing[1]. I wanted both, the highlighted link and the savings.
The NexT theme I’m using with my website generator (Hexo) has a configuration setting to set up a link section to point at social media accounts. Or so it seemed. Two problems: In 2015, when I first started the website Mastodon wasn’t a thing. I couldn’t convince the site to display the Mastodon icon. Second, that pre-configured section doesn’t let me add the html Mastodon is looking for when it scans the site. But, first things first, let’s get the Mastodon icon to show. I figured, maybe updating Hexo would be the ticket? It had gone from version 3.11 to 6.3.0. with plenty of bug fixes and improvements along the way. And this is where the story takes an ugly turn.
The original install on my Mac was done through npm. Unfortunately, as Apple tightens security for their operating system, ease of use for many open-source developer tools has gone by the wayside. An attempt to work with the npm installation on my Mac is greeted with many error messages of this kind:
1 | npm ERR! code EACCES |
While that type of error message sounds like ‘sudo’ would fix the problem, it is discouraged to do so. Instead, the recommended solution is to install npm with a node version manager. So a node manager it is; I picked nvm. Installation of the node manager went without a hitch:
1 | nvm --version |
but an attempt at trying to install hexo is now greeted with:
1 | ERROR: npm v9.2.0 is known not to run on Node.js v12.2.0. You'll need to upgrade |
Well, time to upgrade Node.js. nvm offers any conceivable version, I pick v18.12.1, which installs successfully.
1 | nvm install v18.12.1 |
Back to installing hexo, and this time it does install. But, running it generates this error:
1 | ERROR Plugin load failed: hexo-renderer-sass |
At this point, it becomes clear that my strategy to bring my installation of hexo on my Mac up to date is suboptimal. Not necessarily because continuing down this path won’t succeed, but for two different reasons. First, Apple seems less than committed to support anything that is not part of the Xcode toolchain, making third-party development tools potentially more difficult to maintain. Second, I like to try out various open-source software, every single one possibly requiring updates to the tools they rely on. Who is to say that the requirements of a new piece of software aren’t incompatible with what is already installed, breaking my hexo workflow in the process of installing/upgrading various pieces?

A virtual machine is the way out. It allows me to encapsulate a complete website development environment with only those pieces of software installed that are needed for the task at hand. Snapshots provide a simple way to revert to a previous state should an upgrade fail. Backups are as easy as dragging and dropping a folder to a backup drive. The downside? It is memory and storage intensive; not an issue for my purposes. My laptop has plenty of storage and memory to handle the workload. It typically is used as a one-task computer, not a server where every additional workload is cumulative.
I decided to use Oracle VM VirtualBox as the virtualization product of my choice (it is free!). A long-term supported version of Ubuntu serves as the guest operating system. After creating the virtual machine, which consists merely of pointing VirtualBox at the Ubuntu iso I downloaded there were very few additional things to do. My firewall was configured to serve the same ip address to the virtual machine every time it boots. I then setup access via ssh public key authentication[2] and configured Samba for file access so I can edit with BBEdit from my Mac[3]. That is all I needed to have a generic Linux machine up and running. After taking a snapshot it is time to install the web development tools.
nvm is the starting point from which Node.js can be installed, both are easily accomplished by following instructions on their respective websites, giving me:
1 | npm --version |
This time around Hexo was installed without any warnings:
1 | npm install hexo-cli -g |
The NexT theme I’m using gives me the choice to install with npm or git. I picked git here as I find that less opaque than npm. Speaking of git, this is a good time to put the files under source control so I can see what settings in the configuration I changed. Switching out the markdown renderer to Markdown-it provides support for footnotes and better typography. And, instead of relying on git hooks to trigger an automatic update to my website as I check changes into my Bitbucket depot, I decided to decouple myself from yet another third party and deploy via sftp without Bitbucket in the middle.
Alright, quite a journey. But I got what I set out to get. My Mastodon icon in the sidebar:

As I hinted earlier, the configuration file to create the link section in the side bar of the website didn’t allow me to add the specific html tag that Mastodon was looking for. I ended up adding a link tag
1 | <span> <a rel="me" href="https://twit.social/@ottmarklaas"></a></span> |
into the template for the footer of the website, guaranteeing a link back to Mastodon from every single page on this website.
That’s the price as of today for a user on iOS. I’m not sure how set in stone it is as the pricing strategy seems to lack some rigor: Elon Musk Haggles With Stephen King Over The Price Of A Blue Checkmark. ↩︎
If you have an Apple Watch and 1password I recommend the 1password developer tools to unlock the ssh keys with a double press on your Apple Watch button. Fun! ↩︎
Alternatively, setting up a shared folder between the virtual machine and the host is possible. However, to point the web-browser on the Mac at the hexo server running on the virtual machine a network connection is needed. Given that, my chosen path of setting up a static ip and samba for file sharing seemed like a good choice. ↩︎